Highlights
- OnePlus 12 debuts with a 50MP Sony LYT-808 main camera and 100W fast charging.
- Features Snapdragon 8 Gen 3 chipset, up to 24GB RAM, and 1TB storage.
- 5,400mAh battery with 100W wired and 50W wireless charging capabilities.
- Enhanced durability with IP65 rating and Gorilla Glass Victus 2 protection.
The OnePlus 12, OnePlus’s latest flagship, has garnered significant attention for its impressive features and design.
It marks a continuation of the brand’s philosophy of offering high-performance devices at competitive prices, and many.
Including me, consider it a return to OnePlus’s “Flagship Killer” form.
Here’s a quick review of the OnePlus 12 with my short time.
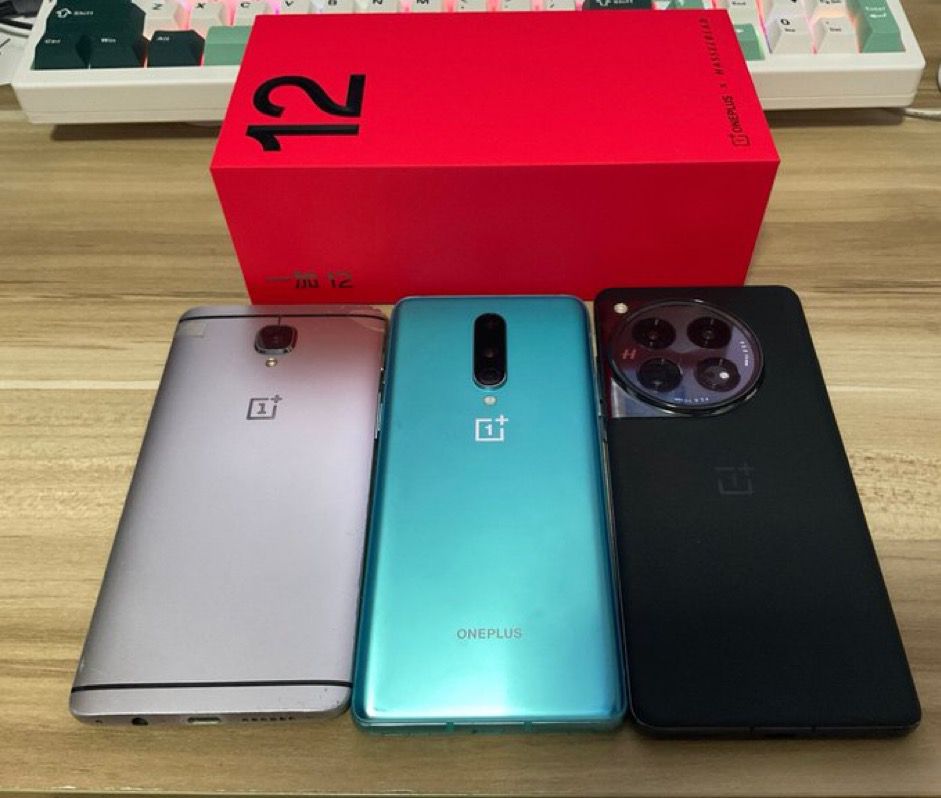
OnePlus 12 Unboxing
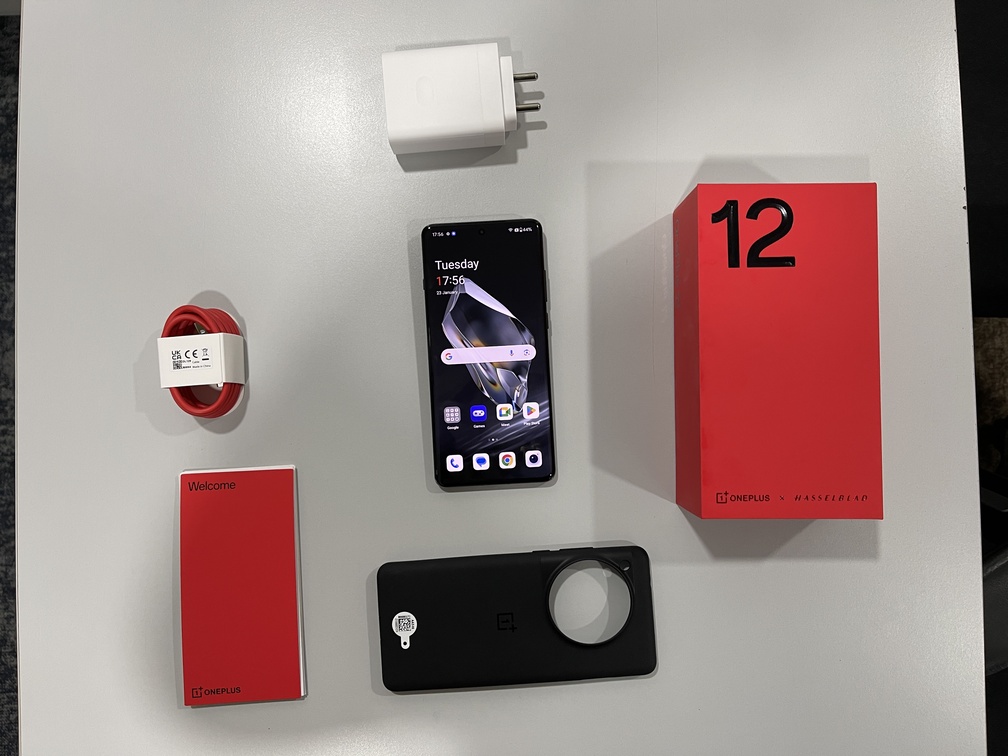
The OnePlus 12’s unboxing experience is thoughtfully designed, maintaining the brand’s reputation for attention to detail.
Inside the box, the phone immediately grabs your attention.
It’s neatly placed at the top, encased in protective packaging to ensure it arrives in pristine condition.
Beneath the phone, a sleek sleeve holds essential accessories.
This includes a durable black silicone case, providing immediate protection for your new device.
OnePlus 12 Unboxing Video
Alongside the case, you’ll find the necessary paperwork, including quick start guides and warranty information, ensuring you have all the details about your device and its features.
A handy SIM ejector toolkit is also included, making it easy to get your phone up and running with your current SIM card.
Below these items, the box houses the powerful 100W charger, a significant highlight given the phone’s fast charging capabilities.
Accompanying the charger is OnePlus’s iconic red USB Type-C cable, known for its durability and quick charging capabilities.
OnePlus 12: Key Specs
- Platform: Qualcomm Snapdragon 8 Gen 3 SoC
- Memory: 24GB LPDDR5X RAM
- Storage:1TB UFS 4.0 ROM
- Display:6.8-inch 120Hz 2K Super Fluid AMOLED display
- Battery: 5400 mAh dual-cell battery
- Charging: 100W SUPERVOOC fast wired charging
- Cameras: 50MP main camera, 64MP telephoto, 48MP ultra-wide
- Dimensions:164.3×75.8×9.15mm
- Weight: 220g
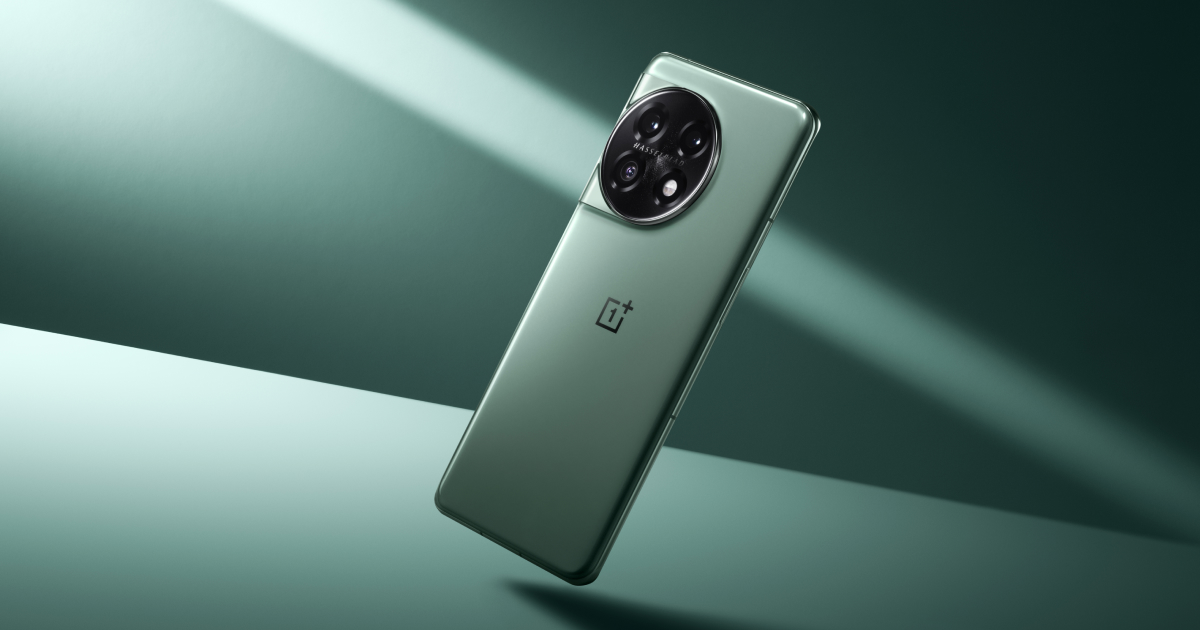
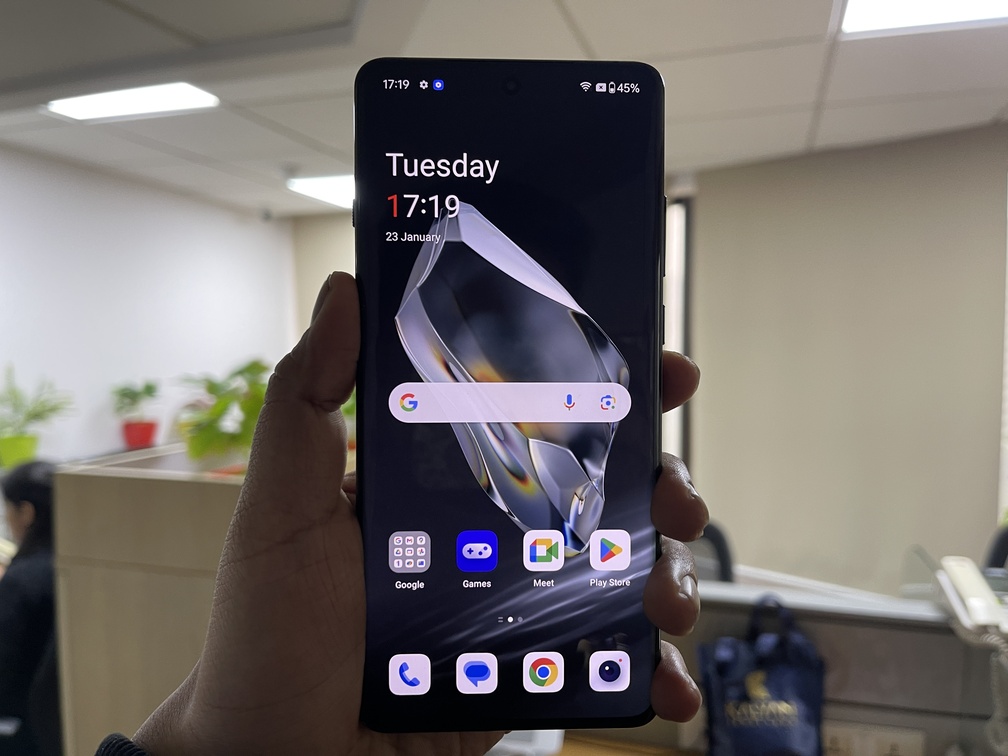
OnePlus 12 Design, Display, and Durability
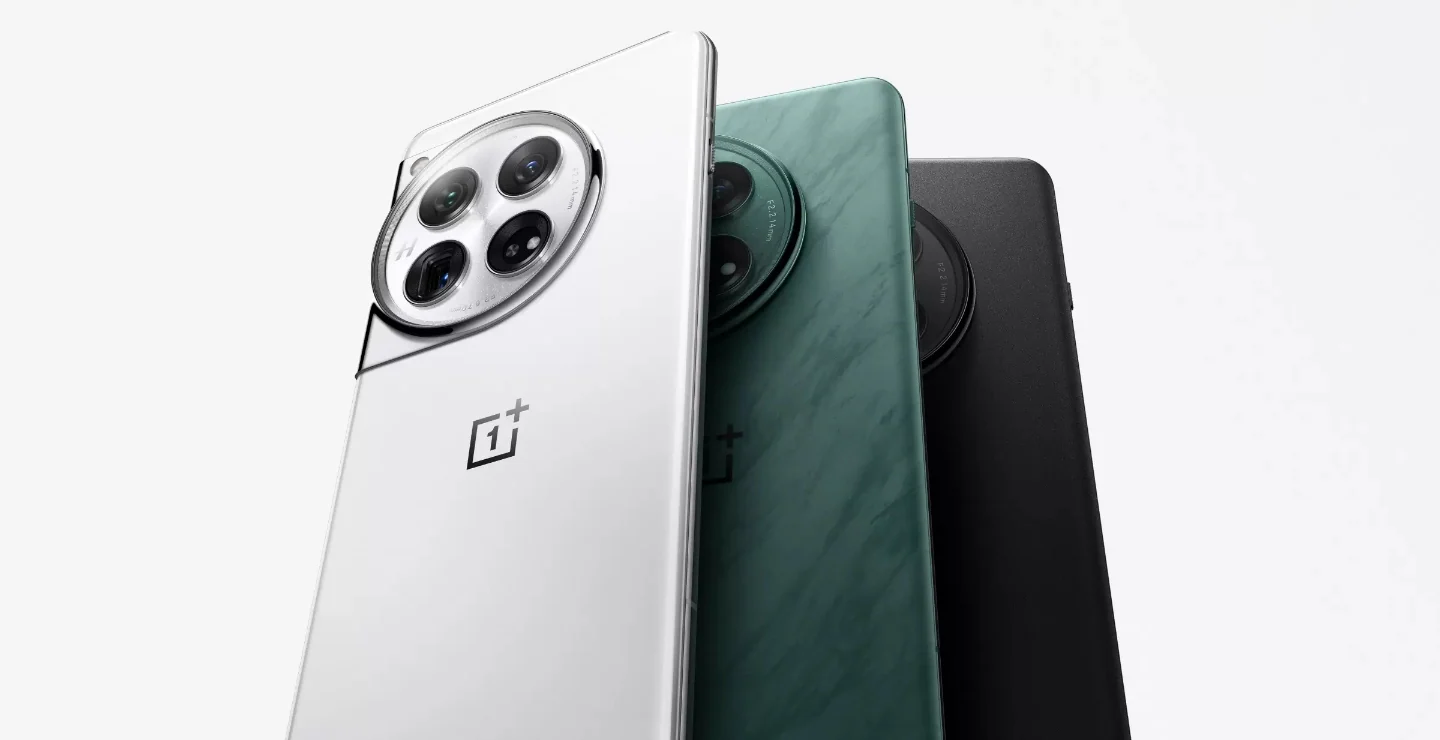
Design-wise, the OnePlus 12 doesn’t deviate much from its predecessor, the OnePlus 11, but introduces subtle improvements.
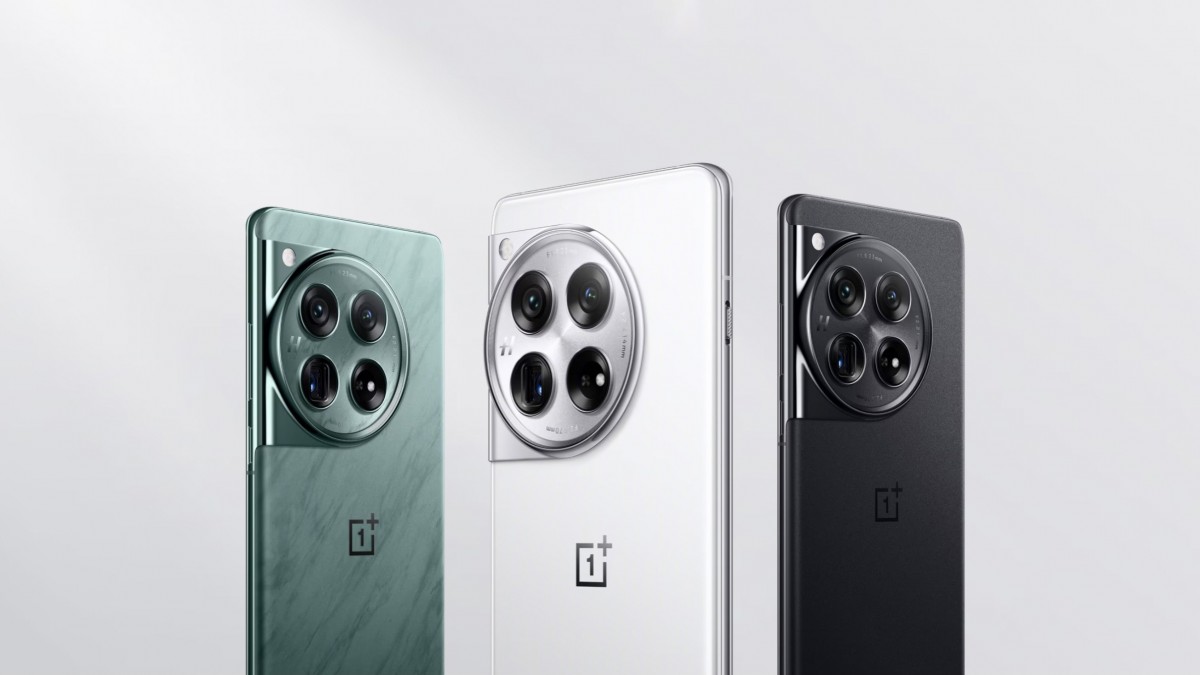
A notable change is its new “Flowy Emerald” colour variant, which presents a dynamic, fluid-like pattern that shifts from a green hue to light blue when tilted.
Apart from that the design is as robust as it gets with the circular camera hump positioned in the corner just like its predecessor.
I did feel the OnePlus 12 to be slightly heavier than expected, weighing in at 220 grams, but more on that in the full review of the device.
Now moving on to the viewing experience, despite its larger 6.8-inch display and increased dimensions, the device manages to feel smaller thanks to its curved back, enhancing the ergonomic experience.
I do like the 2800nits of peak brightness on offer and the 2K 120Hz refresh rate and ProXDR functionality in my initial viewing.
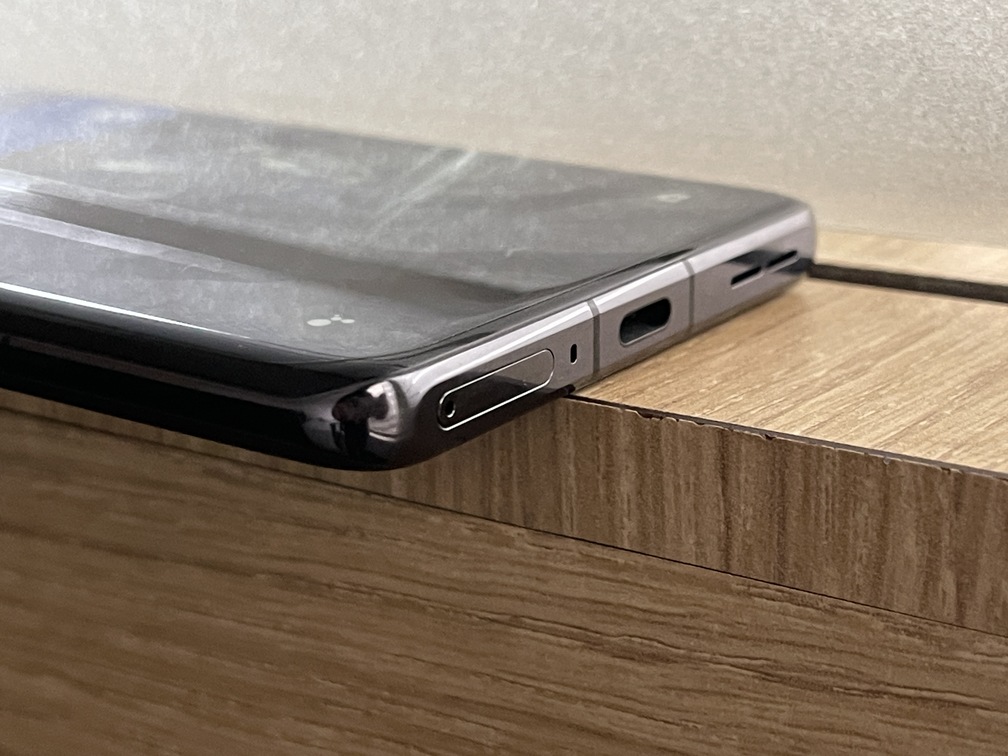
In terms of durability, the OnePlus 12 has improved its resistance to elements with an IP65 rating, signifying protection against dust and strong jets of water.
The device’s display is protected by Corning Gorilla Glass Victus 2 and comes pre-applied with a basic screen protector.
I will, of course, be testing the device more thoroughly in my full review.
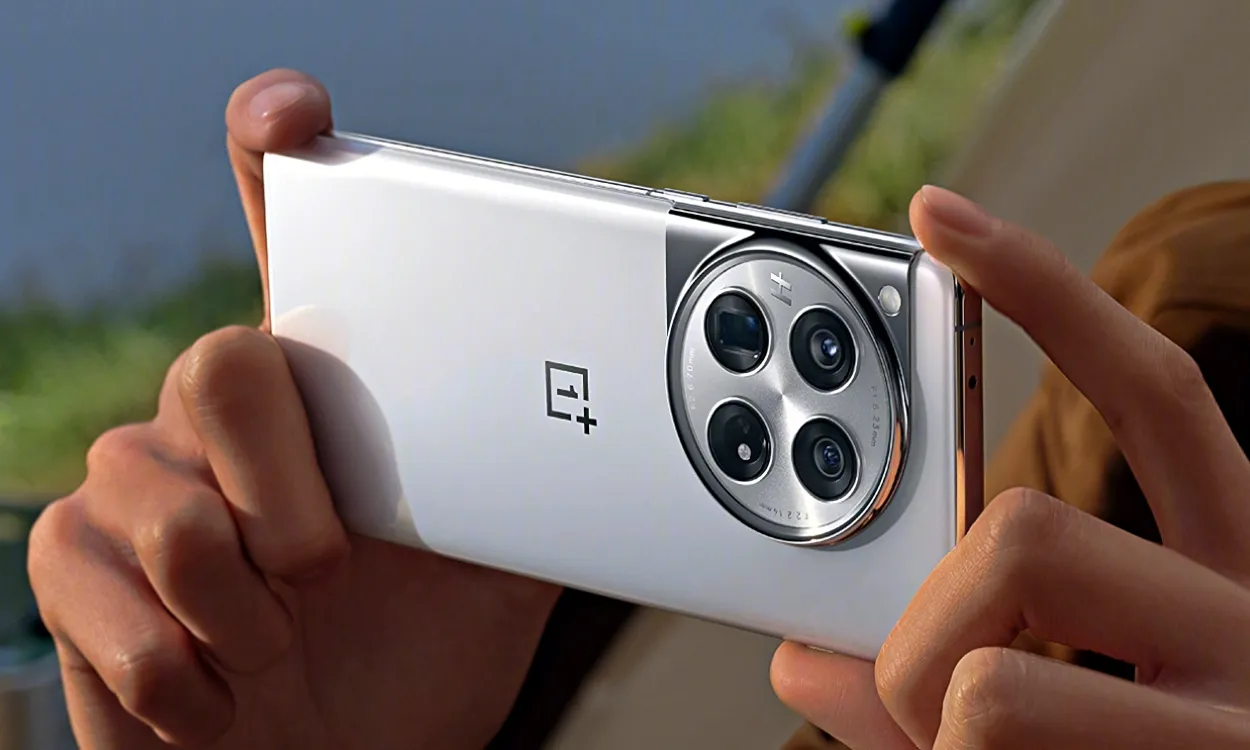
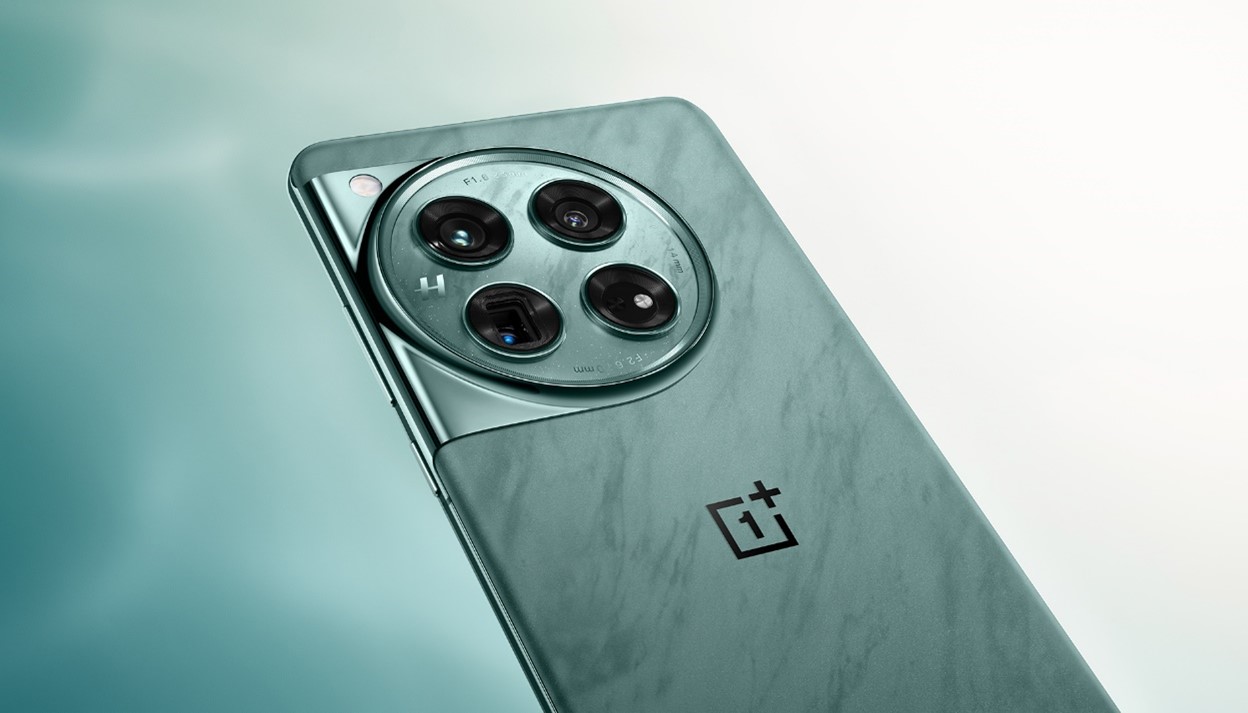
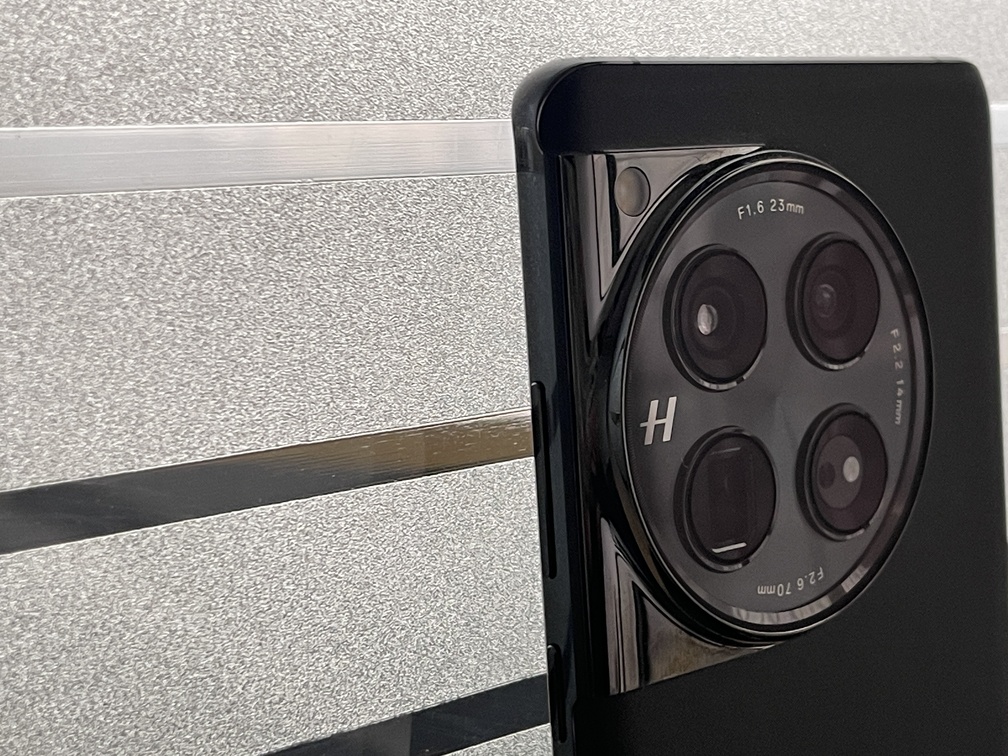
OnePlus 12 Camera Setup

Coming now to the camera system of the OnePlus 12 which is a significant focus.
It features a new 50MP Sony LYT-808 sensor for its main camera, a 48MP ultra-wide camera, and a 64MP telephoto lens with 3X optical zoom.
This setup aims to enhance low-light performance and overall image quality.
There is also a 32MP selfie camera on the front.
There are a ton of photo and video-taking tweaks that can are there to be explored on the OnePlus 12.
My initial impressions of the device were quite positive and I expect little to change when I review the device fully.
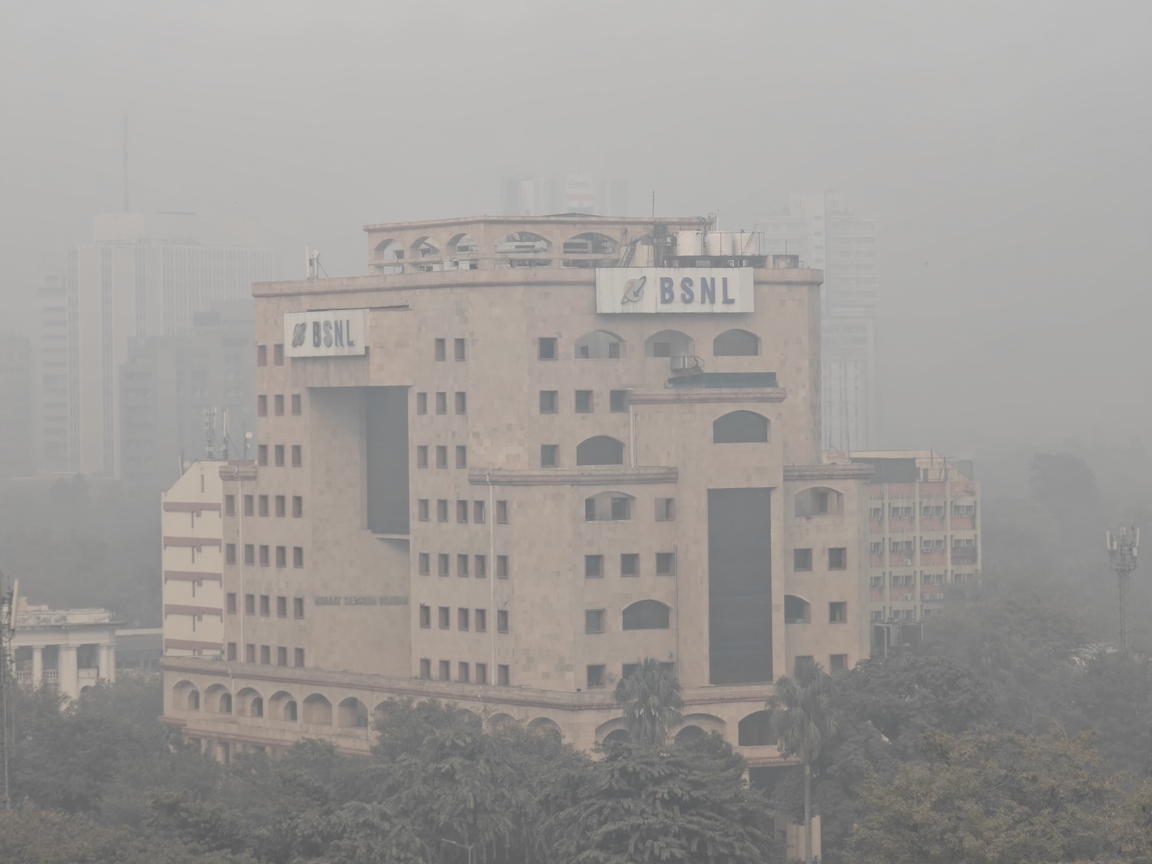
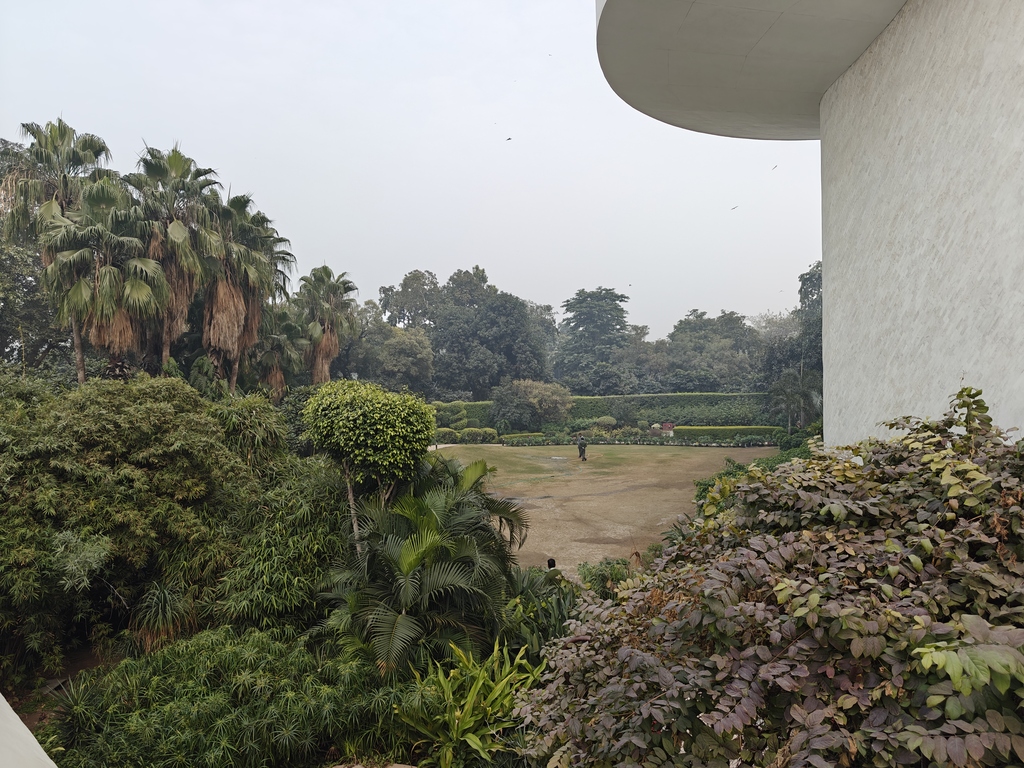
OnePlus 12 Daylight Video Sample
OnePlus 12 Camera Samples


OnePlus 12 Performance and Software

Performance-wise, the OnePlus 12 is powered by the Qualcomm Snapdragon 8 Gen 3 chipset, which is sure to promise enhanced efficiency and speed.
It offers up to 24GB of RAM and up to 1TB of internal storage.
The company mentions several enhancements for gamers like HyperRendering which leverages the 8 Gen 3 to increase the frame rate.
There’s also a Dual Cryo-velocity Cooling System and massive VC for extended gaming sessions.
Stay tuned for a comprehensive test of the device’s capabilities.
The phone runs on Android 14 with OnePlus’s Oxygen OS, which is known for its customisability and user-friendly interface.
OnePlus 12 Battery and Features
Battery capacity has seen a minor increase to 5,400mAh from 5,000mAh last time around and the phone does support 100W wired SUPERVOOC S charging, which is expected to be very fast.
Additionally, it reintroduces 50W wireless charging, a feature missing from its predecessor.
Another interesting feature is the inclusion of an IR blaster, which is uncommon in OnePlus devices.
OnePlus has also focused on improving the haptic feedback by introducing a new Bionic Vibration Motor Turbo.
OnePlus 12 Verdict
Overall, the OnePlus 12 is shaping up to be an exciting addition to the Android flagship market, offering a blend of innovative features, solid performance, and a distinctive design.
For more details regarding the device, stay tuned to our website as we push out a full and comprehensive review for the same.
ONEPLUS 12 KEY SPECIFICATION
Key Specs
| RAM | 8 GB |
| Processor | Qualcomm Snapdragon 888 |
| Rear Camera | 50 MP + 8 MP + 48 MP |
| Front Camera | 32 MP |
| Battery | 5000 mAh |
| Display | 6.7 inches (17.02 cm) |
General
| Launch Date | June 7, 2023 (Unofficial) |
| Operating System | Android v12 |
Performance
| Chipset | Qualcomm Snapdragon 888 |
| CPU | Octa core (2.84 GHz, Single core, Kryo 680 + 2.42 GHz, Tri core, Kryo 680 + 1.8 GHz, Quad core, Kryo 680) |
| Architecture | 64 bit |
| Fabrication | 5 nm |
| Graphics | Adreno 660 |
| RAM | 8 GB |
Display
| Display Type | OLED |
| Screen Size | 6.7 inches (17.02 cm) |
| Resolution | 1080 x 2400 pixels |
| Pixel Density | 393 ppi |
| Screen Protection | Corning Gorilla Glass v5 |
| Bezel-less display | Yes with punch-hole display |
| Touch Screen | Yes, Capacitive Touchscreen, Multi-touch |
Camera
| MAIN CAMERA | ||
| Camera Setup | Triple | |
| Resolution | 50 MP, Primary Camera 8 MP 48 MP |
|
| Autofocus | Yes | |
| Flash | Yes, LED Flash | |
| Image Resolution | 8150 x 6150 Pixels | |
| Settings | Exposure compensation, ISO control | |
| Shooting Modes | Continuous Shooting High Dynamic Range mode (HDR) |
|
| Camera Features | Digital Zoom Auto Flash Face detection Touch to focus |
|
| Video Recording | 1920×1080 @ 30 fps | |
| FRONT CAMERA | ||
| Camera Setup | Single | |
| Resolution | 32 MP, Primary Camera | |
| Video Recording | 1920×1080 @ 30 fps | |
Battery
| Capacity | 5000 mAh |
| Type | Li-Polymer |
| Removable | No |
| Quick Charging | Yes, Fast |
| USB Type-C | Yes |
Storage
| Internal Memory | 128 GB |
| Expandable Memory | No |
Network & Connectivity
| SIM Slot(s) | Dual SIM, GSM+CDMA |
| SIM Size | SIM1: Nano, SIM2: Nano |
| Network Support | 5G Not Supported in India, 4G Supported in India, 3G, 2G |
| VoLTE | Yes |
| SIM 1 |
4G Bands:
TD-LTE 2300(band 40)
FD-LTE 1800(band 3) 3G Bands:
UMTS 1900 / 2100 / 850 / 900 MHz
2G Bands:
GSM 1800 / 1900 / 850 / 900 MHz
GPRS:
Available
EDGE:
Available
|
| SIM 2 |
4G Bands:
TD-LTE 2300(band 40)
FD-LTE 1800(band 3) 3G Bands:
UMTS 1900 / 2100 / 850 / 900 MHz
2G Bands:
GSM 1800 / 1900 / 850 / 900 MHz
GPRS:
Available
EDGE:
Available
|
| Wi-Fi | Yes, Wi-Fi 4 (802.11 b/g/n) |
| Wi-Fi Features | Mobile Hotspot |
| Bluetooth | Yes, v5.2 |
| GPS | Yes with A-GPS, Glonass |
| NFC | Yes |
| USB Connectivity | Mass storage device, USB charging |
Multimedia
| Loudspeaker | Yes |
| Audio Jack | USB Type-C |
Sensors
| Fingerprint Sensor | Yes |
| Fingerprint Sensor Position | On-screen |
| Fingerprint Sensor Type | Optical |
| Other Sensors | Light sensor, Proximity sensor, Accelerometer, Compass, Gyroscope |
FAQs
What are the standout features of the OnePlus 12?
The OnePlus 12 impresses with its 50MP Sony main camera, Snapdragon 8 Gen 3 chipset, and a robust 5,400mAh battery with 100W SUPERVOOC S charging, marking a significant upgrade in performance and efficiency.
How does the camera system of the OnePlus 12 compare to its predecessors?
The OnePlus 12’s camera system, featuring a new 50MP main sensor and enhanced low-light performance, shows a notable improvement over previous models, promising high-quality photography and videography.
What improvements in design and durability are seen in the OnePlus 12?
The OnePlus 12 introduces the “Flowy Emerald” color variant and improved durability with an IP65 rating for dust and water resistance, and Gorilla Glass Victus 2 for screen protection.
How does the OnePlus 12 perform in terms of gaming and software experience?
With the Snapdragon 8 Gen 3 chipset and up to 24GB RAM, the OnePlus 12 offers a seamless gaming experience, complemented by OnePlus’s Oxygen OS known for its customizability.
Is the OnePlus 12 a good buy for its price?
Given its high-end features, strong performance, and competitive pricing, the OnePlus 12 stands as an attractive option in the Android flagship market.
When and where can I watch the OnePlus 12 India launch event?
The OnePlus 12 launch event is scheduled for January 23 at 7:30 PM IST, live-streamed on the company’s YouTube channel, Facebook, and X (formerly Twitter), and the official OnePlus website.
What are the expected prices for the OnePlus 12 and 12R in India?
The OnePlus 12 is rumoured to start at Rs 64,999 for the 12GB RAM version and Rs 69,999 for the 16GB RAM model. The OnePlus 12R might begin at Rs 39,999.
What are some standout features of the OnePlus 12?
The OnePlus 12 is known for its Snapdragon 8 Gen 3 processor, 5400mAh battery with 100W charging, 2K 120Hz ProXDR display, and the 4th Gen Hasselblad Camera.
Where will the OnePlus 12 be available for purchase in India?
The new OnePlus devices, including the Buds 3, will be available on Amazon India and the official OnePlus India website.
How to Watch the OnePlus 12 Launch Event?
OnePlus will be live-streaming the event on its YouTube channel, starting at 19:30 IST, January 23, 2024.
You can also register on the OnePlus Smooth Beyond Belief Launch Event page to stay on top of the latest news and announcements.
What are the leaked prices for the OnePlus 12 in India?
The OnePlus 12 is rumored to start at Rs 64,999 for the 12GB RAM and 256GB storage model, with the higher-end 16GB RAM and 512GB storage variant priced at Rs 69,999.
How does the OnePlus 12’s pricing compare to its predecessor?
The leaked prices show a notable increase from the OnePlus 11, which was launched at lower price points – Rs 56,999 for the 8/128GB model and Rs 61,999 for the 16/256GB variant.
When will the OnePlus 12 be available for purchase?
Sales for the OnePlus 12 are tipped to start on January 30th in India, just a week after its anticipated launch.
Is there a more budget-friendly option in the OnePlus 12 series?
The OnePlus 12R, a more affordable variant in the series, is expected to be available from February, offering consumers a cost-effective alternative.
What does the OnePlus and Pixelworks partnership bring to the OnePlus 12?
The collaboration between OnePlus and Pixelworks introduces the Pixelworks X7 Independent Visual Processor into the OnePlus 12.
This integration is set to significantly enhance the device’s graphics and visual performance, particularly in gaming, with features like 2K super-resolution and 120fps motion quality.
How will the Pixelworks X7 Processor improve the gaming experience on the OnePlus 12?
The Pixelworks X7 Processor in the OnePlus 12 is designed to amplify the gaming experience with its HyperRendering technology.
This will lead to smoother graphics, better color accuracy, and reduced latency, making games more immersive and visually stunning.
What are the technical benefits of the Pixelworks X7 Processor in OnePlus 12?
The OnePlus 12, with the Pixelworks X7 Processor, offers advanced technical benefits like ultra-low 10ms latency, real-time color calibration, and smooth motion quality at 120fps. These features contribute to a superior visual experience on the mobile device.
Are there any other significant features of the OnePlus 12 apart from the Pixelworks integration?
Beyond the Pixelworks partnership, the OnePlus 12 boasts a Qualcomm Snapdragon 8 Gen 3 chipset, up to 24GB RAM and 1TB storage options, Hasselblad cameras with triple lens setup, and supports 50W AIRVOOC wireless charging alongside a 5400mAh battery with 100W wired fast charging.
What are the key specifications of the OnePlus 12 as revealed on Amazon?
The OnePlus 12 is set to include the Qualcomm Snapdragon 8 Gen 3 chipset, 12GB of RAM, and 256GB of storage.
A higher-end variant with 24GB RAM and 1TB storage is also expected. The device will feature 4th-generation Hasselblad cameras, including a 50MP primary camera with OIS, a 64MP telephoto lens, and a 48MP ultrawide lens.
How does the OnePlus 12R differ from the OnePlus 12?
The OnePlus 12R is expected to be equipped with the Snapdragon 8 Gen 2 chipset and a 6.7-inch AMOLED display with a 1.5K resolution.
It will also have a triple-camera setup, but with a 50MP primary sensor and a 5,500mAh battery, the largest in a OnePlus phone to date.
What are the charging capabilities of the OnePlus 12?
The OnePlus 12 will support 50W AIRVOOC wireless charging and 100W wired fast charging, ensuring rapid battery replenishment and extended usage.
What is the expected pricing of the OnePlus 12 and 12R in India?
The OnePlus 12 is anticipated to be priced around Rs 60,000, based on its pricing in China and the upgrades it offers over the OnePlus 11. The OnePlus 12R, with slightly lower specs, is expected to be priced around Rs 50,000 or less.
What is unique about the Pale Green colour of the OnePlus 12?
The Pale Green colour for the OnePlus 12 represents a continuation of OnePlus’s tradition of offering a green shade in its flagship lineup.
For the OnePlus 12, this green has been revamped, providing a fresh and distinctive appearance that aligns with the brand’s recognizable aesthetic.
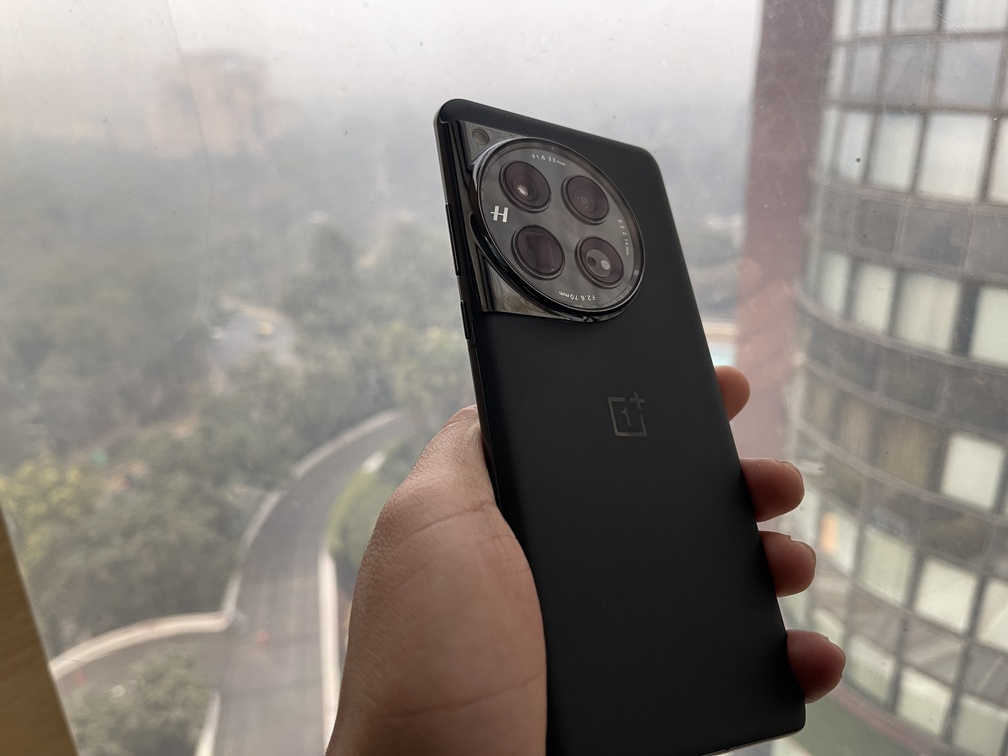
How does the Rock Black variant of the OnePlus 12 stand out?
The Rock Black colour of the OnePlus 12 is characterized by its matte frosted finish. This choice not only enhances the phone’s visual appeal but also serves a practical purpose by reducing fingerprint smudges.
The black variant integrates seamlessly with the phone’s large camera island, offering a polished and premium feel.
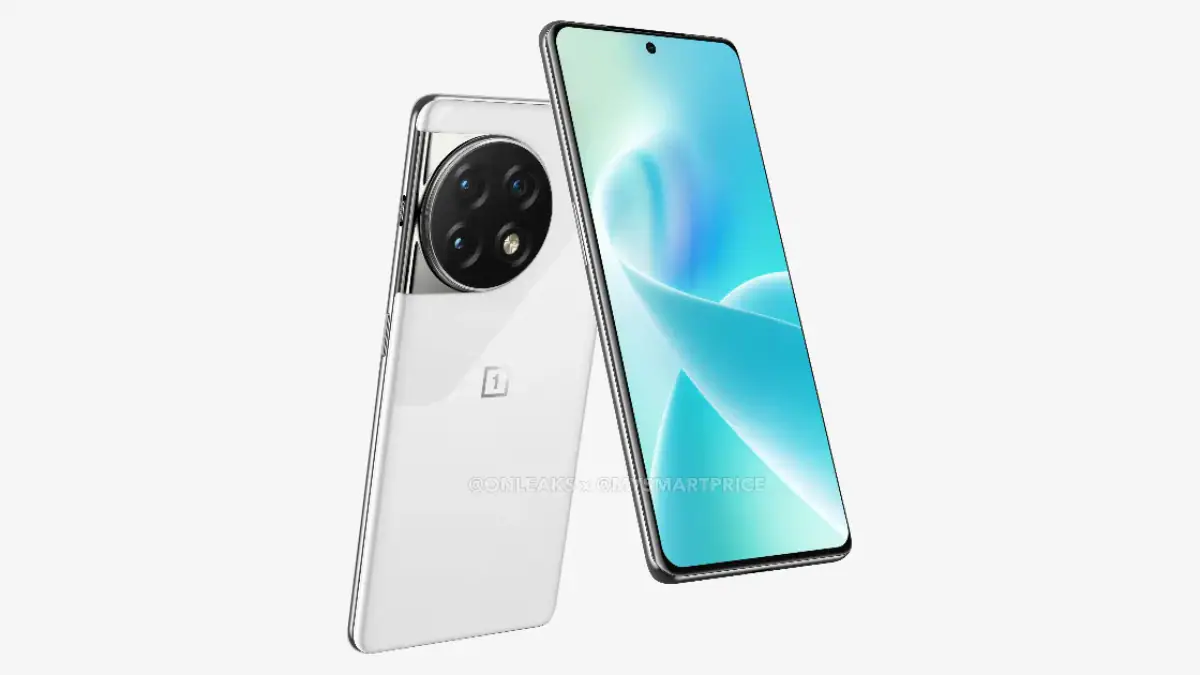
What are the key features of the OnePlus 12’s display and battery?
The OnePlus 12 features a 6.8-inch 120Hz 2K Super Fluid AMOLED display with a peak brightness of 4500nits.
It’s powered by a 5400 mAh dual-cell battery, supporting 100W SUPERVOOC fast wired charging and 50W AIRVOOC wireless charging, capable of fully charging the phone in 26 minutes (wired) and 55 minutes (wireless).
Can you describe the camera capabilities of the OnePlus 12?
The OnePlus 12 comes equipped with a 4th Gen Hasselblad Camera for Mobile, featuring a triple camera system.
This includes a LYT808 50MP main camera, a 64MP OV64B 3X periscope telephoto camera, and a 48MP ultra-wide camera, alongside a 32MP front selfie shooter.
What design innovations are present in the OnePlus 12?
The OnePlus 12’s design is inspired by nature, particularly evident in its Flowy Emerald colorway.
The device also incorporates a new generation of ceramic glass technology with a matte finish and retains the iconic three-stage alert slider, now repositioned for improved antenna performance.
Also Read: OnePlus 12 Series Pricing Revealed Ahead of Tomorrow’s Launch
Also Read: OnePlus Buds 3 to be Unveiled Alongside OnePlus 12 in India
Also Read: OnePlus 12R Revealed In New Renders, Spotted on Geekbench Ahead of Launch
Also Read: OnePlus 12 and 12R Pricing Leaked Ahead of India Launch
Also Read: OnePlus 12 Series Amazon Microsite Goes Live Ahead of India Launch
Also Read: OnePlus 12 Launch in India: When and Where To Watch, Pricing, Expected Features, and More