
Highlight
- You can track your friends’ real-time locations using Google Maps.
- Share live location information with ease for better coordination and safety.
- Enhance your ability to stay connected and make plans efficiently through location-tracking features.
Thanks to the power of technology and the availability of GPS-based services, tracking someone’s live location is a useful feature for various purposes, such as ensuring safety during trips or coordinating meetups efficiently.
Google Maps, one of the most popular navigation apps, offers a simple and effective way to track your friends’ live locations.
In this blog, we’ll guide you through the detailed process of how to do just that, including requesting location from your friends.
Before you can begin tracking your friends’ live locations, ensure that you have Google Maps installed on your smartphone.
The app is available for both Android and iOS devices and can be downloaded from their respective app stores.
Once you have the latest version of Google Maps installed on your smartphone, follow the below steps to successfully track friends’ live locations.
Enable Location Services
To track someone’s live location, you need to enable location services on your device and ensure your friends do the same. Here’s how to do it:
Android Users:
- Open your phone’s ‘Settings.’
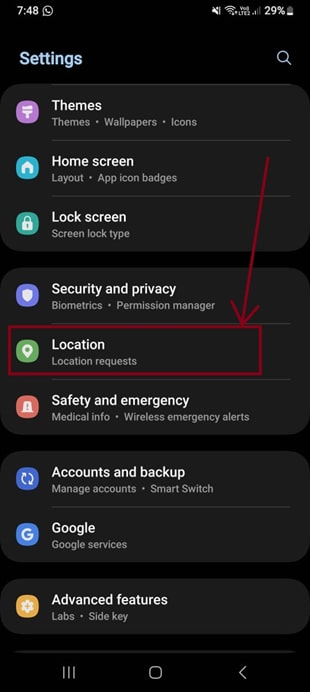
- Scroll down and tap ‘Location.’
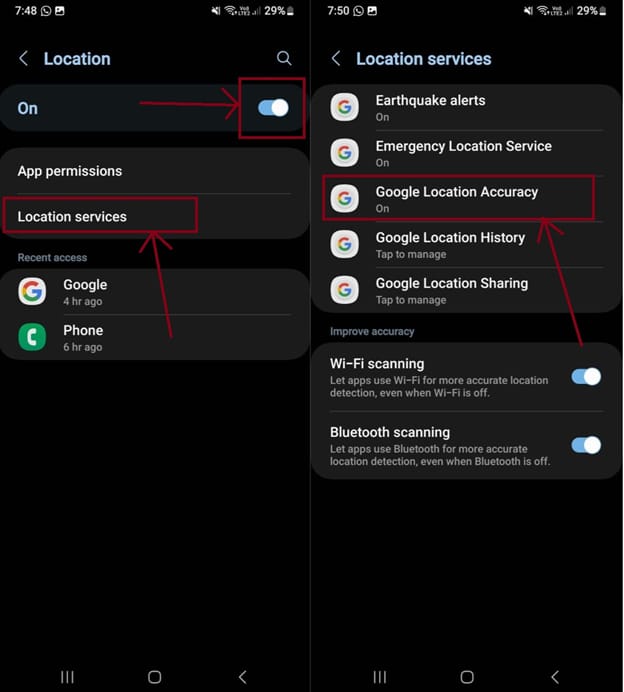
- Toggle on the ‘Location’ switch and select ‘Location Services.’
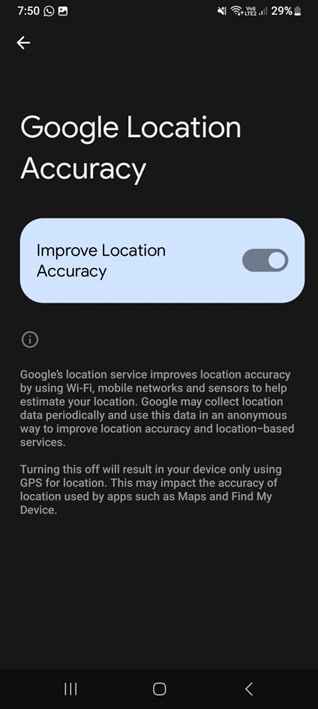
- On the next page, select ‘Google Location Accuracy’ and enable it.
iOS Users:
- Open your iPhone’s ‘Settings.’
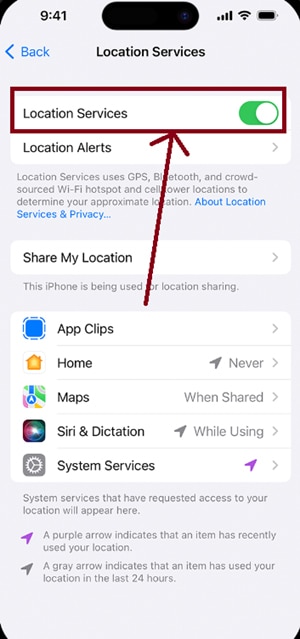
- Scroll down and tap ‘Privacy.’
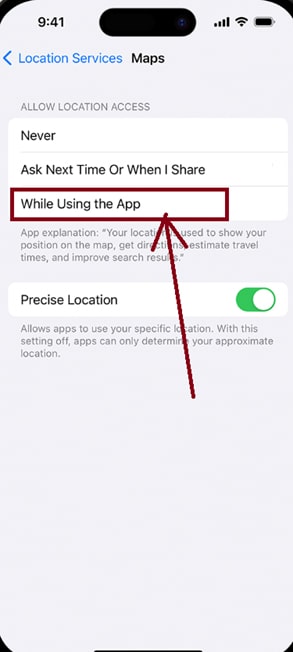
- Select ‘Location Services.’
- Toggle on the ‘Location Services’ switch.
- Scroll down to ‘Google Maps’ and ensure it’s set to ‘While Using the App.’
Request Your Friend’s Location
Before you can track someone, you need to request their live location.
You can send a location-sharing request after you share your own location with them.
Here’s how to do it:
- Open Google Maps on your device.

- Tap on the Profile icon (usually located in the top-left corner) and Select ‘Location sharing’ > ‘Share location.’
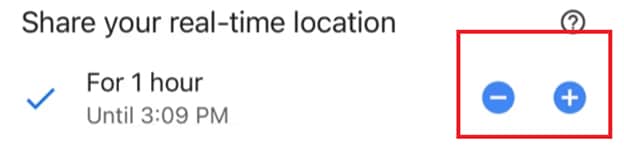
- Choose how long you want to share your location (e.g., 1 hour, until you turn it off, or a custom time).
- Select your friend’s contact name or enter their email address and tap “Share”.
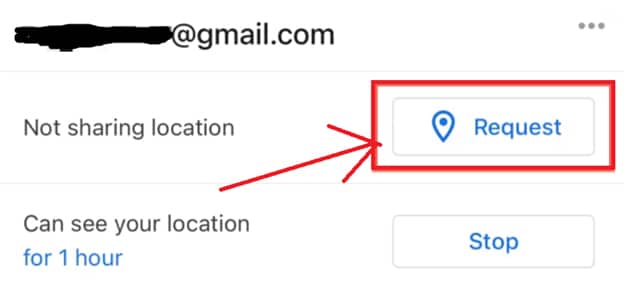
- Once you share your location, you can request that your contact share theirs with you. Select the contact, then tap “Request.”
Your Friend Accepts the Location Request
Once you’ve sent a location request to your friend, they’ll receive a notification or an email invite.
Here’s what they need to do:
- Open the message or email they received.

- Tap ‘Accept’ or ‘View location request.’
- This will open Google Maps with your location request displayed.
Start Tracking Your Friend’s Live Location
Once your friend accepts the location request, you can begin tracking their live location:
- Open Google Maps on your device.
- Tap the profile icon in the top-left corner.
- Select ‘Location sharing.’
- You’ll see your friend’s name and their location on the map in real-time.
- You can also check the estimated time of arrival (ETA) if they are navigating somewhere.
Stop Sharing Location (Optional)
If you want to stop sharing your location or end the tracking session, follow these steps:
- Open Google Maps.
- Tap the menu icon (three horizontal lines) in the top-left corner.
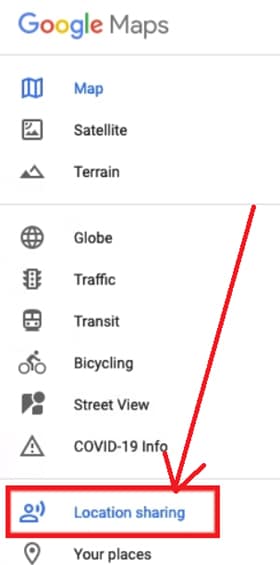
- Select ‘Location sharing.’
- Choose your friend’s name or the location request you sent.
- Tap ‘Stop sharing.’
Ensure Privacy and Security
Always share your location only with people you trust, and remember that you have control over how long you share your location.
Additionally, you can stop sharing at any time to protect your privacy further.
FAQs
Q1. How to hide someone on Google Maps?
Answer. To hide someone on Google Maps, follow these steps:
- On your Android phone or tablet, open the Google Maps app.
- Tap Saved. Under “Your lists,” tap Labeled.
- Next to your contact, tap More. To hide a contact from showing up on Google Maps, tap Hide contact in Maps. Hide.
Q2. Can Google Maps be private?
Answer. You now have more ways to control your privacy on Google Maps. Use Incognito mode when you don’t want your activity—like the places you search for or navigate to—to be saved to your Google Account.
Q3. How do I hide my address on Google?
Answer. Here’s the step-by-step breakdown of how to hide your address in Google My Business.
- Log in to your Google account associated with your listing.
- Click on your “info” tab.
- Find the address section. …
- Find the section that reads: “Clear address” and click it to clear out any information.
- Click “Apply”.
Q4. How can I save offline maps for use when I don’t have an internet connection?
Answer: To save offline maps in Google Maps, follow these steps:
- Open the Google Maps app on your device.
- Ensure you’re connected to the internet.
- Search for the area or location you want to save.
- Tap on the location name or address.
- Scroll down and select “Download” or “Download offline map.”
- Choose the area you want to download by moving and resizing the map as needed.
- Tap “Download.”
These offline maps will be available for navigation when you’re not connected to the internet.
Q5. How do I change the default navigation app on my smartphone to Google Maps?
Answer: To set Google Maps as your default navigation app, go to your phone’s settings. Navigate to “Apps” or “Applications,” find the current default navigation app, and select “Clear Defaults.” The next time you use a navigation link or app, it will prompt you to choose a default, where you can select Google Maps.


