")
If you are planning on replacing your cable connection with streaming services, you will need a device to connect to your TV. One affordable, easily available and simple-to-use option is the Amazon Fire TV Stick.
We have prepared this quick step-by-step guide on how to set up your Amazon Fire TV Stick and how to navigate through your new device. So, let’s get started.
Unboxing Amazon Fire TV Stick
Let’s start by unboxing the Amazon Fire TV Stick and checking the in-box content. The retail package will have the following items –
- A Start Guide
- An HDMI extender
- A Micro USB Cable
- 2 Triple Batteries
- A Wall Plug Power Adapter
- A Remote
- The Fire TV Stick
Also Read: Amazon Fire TV makes it easy to watch the live TV you love
How To Set Up the Amazon Fire TV Stick?
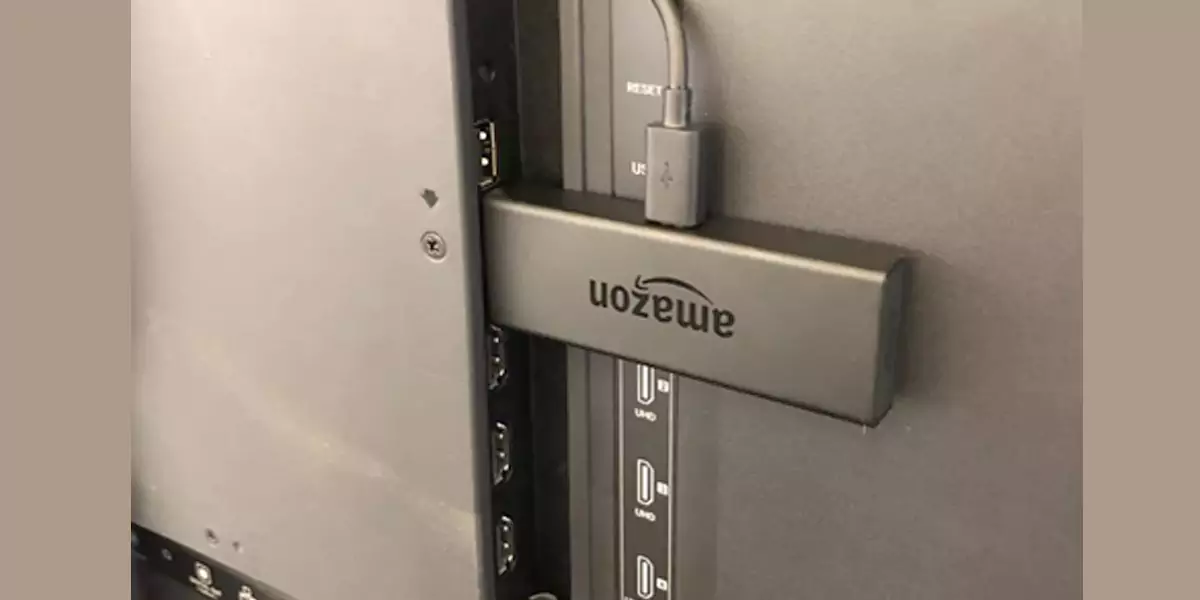
Step 1 – Plug the Fire Stick In
- First things first, take the Micro USB Cable and plug the small end into your Amazon Fire TV Stick.
- Then put the other end into the wall adapter and plug it into the wall.
- Now plug the Amazon Fire TV Stick into an HDMI Port on the TV.
- (In case you cannot connect the Fire Stick to the HDMI port for some reason such as another connected cable obstructing the path, use the HDMI extender. The Fire TV Stick comes with an HDMI extender that can make it easier for the Fire Stick to stay in place.)
- Connect the extender to the device, then plug the extender into the HDMI port on your TV.
- Remember the number next to the input you chose. You will need it for the next steps.
Step 2: Tune Your TV
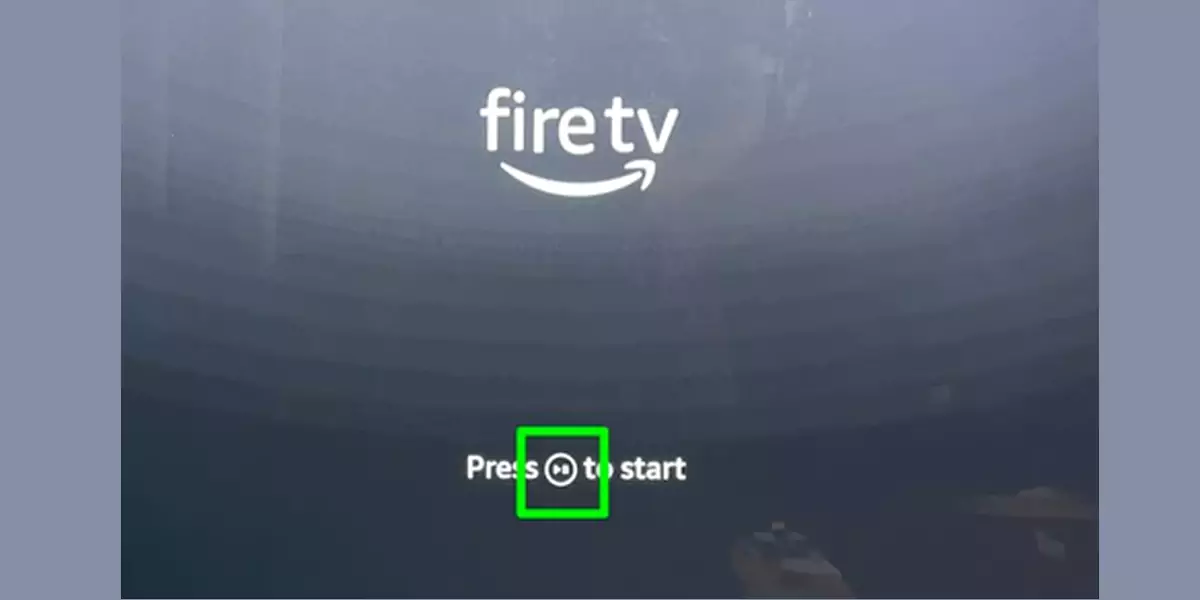
- On your TV remote, use the input, source, or a similar button to tune your TV to the same input as your Amazon Fire TV Stick. The input on the source menu should match the number next to the HDMI port on your TV where you plugged in the device.
- Once you select the right input, you should see the “Welcome Screen.”
- In order to work your Fire Stick, you need to use the Amazon remote provided in the box.
- Insert the triple batteries into the back of the remote in the direction indicated and the remote should then pair automatically.
Step 3: Start the On-Screen Setup
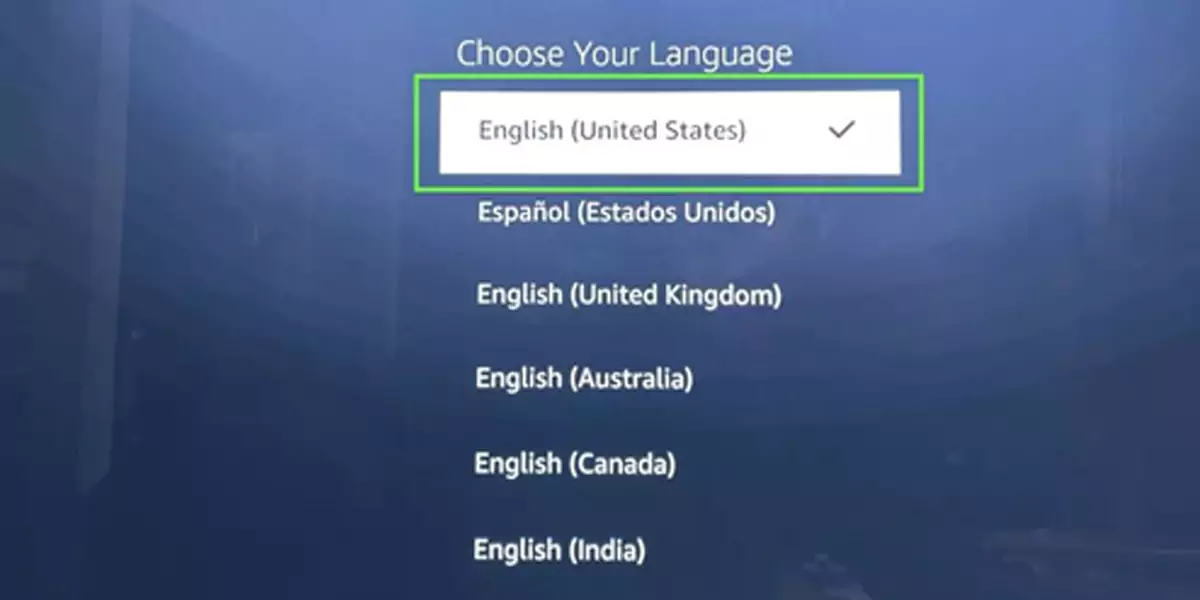
- Once you pair the remote, click the Play/Pause button and select your preferred language.
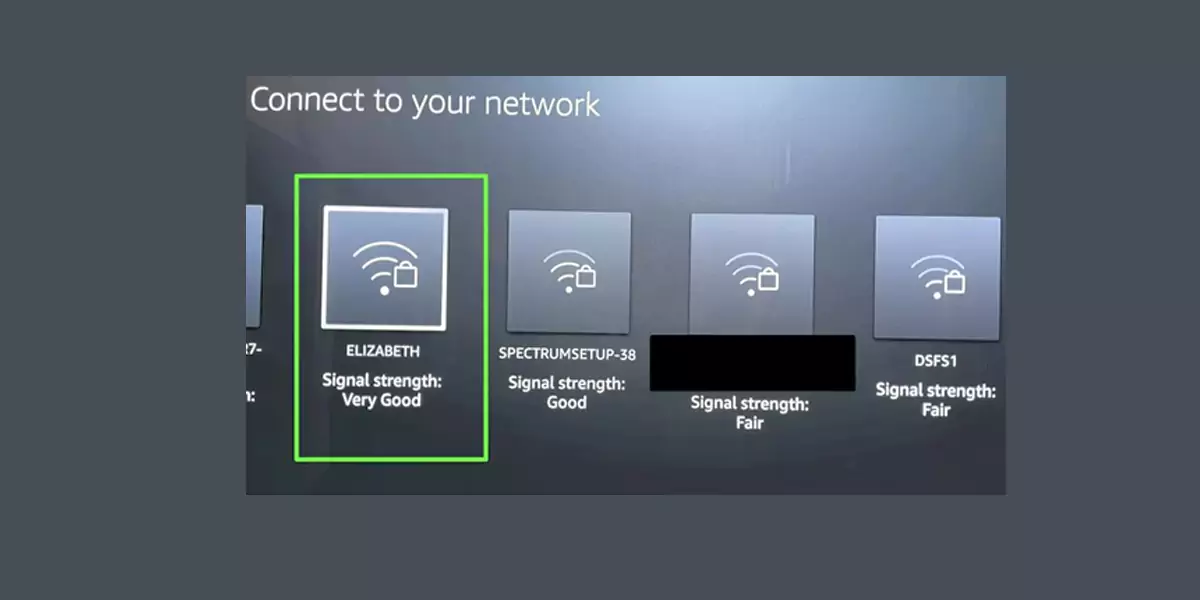
- Then, the Fire TV Stick will scan for Wi-Fi.
- Select your Wi-Fi and enter the password to connect to the wireless internet.
- Once connected, the Fire Stick will check for updates. It may take a few minutes for the update installation before the device can restart for use.
Step 4: Activate your Amazon Fire TV Stick
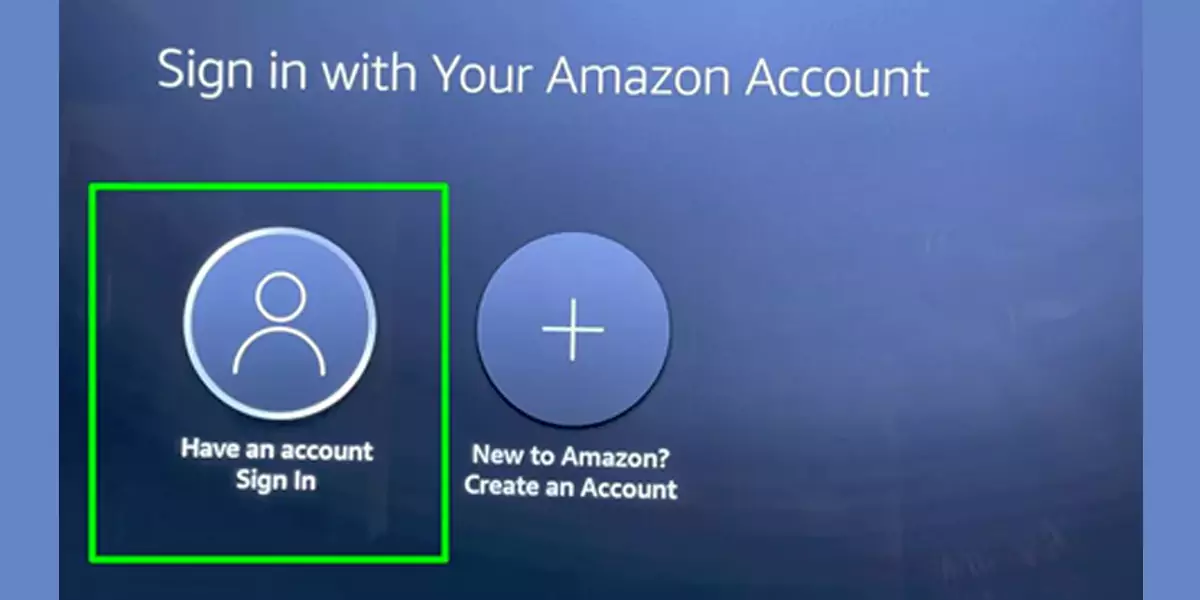
- The streaming device needs to be linked to your Amazon account. In case you have an Amazon account, just enter the login information to sign in. And those who don’t have an account can create a new account.
- Signing into the Fire TV Stick registers your new device and connects it to your Amazon account.
Step 5: Choose Preferences and Complete the Setup
- Once you’ve logged in, you can choose to save your Wi-Fi password to your Amazon account to allow it to connect to compatible devices that you’re logged in on.
- Next, you can enable parental controls in case required.
- You also have to set up the remote so that you can control the volume and power of your tv on and off with it. The sound will play and the device will prompt you to use the volume button on your Amazon remote to turn it up or down to test if the remote works. In case it does not work, select the “No” option and follow the on-screen instructions to fix the problem. When it works, select the “Yes” option and you are good to go.
Also Read: Amazon Fire TV Cube hits lowest price ever