Formatting is the process of deleting or erasing all the files in a storage device. Sometimes formatting can retrieve the device after corruption. Experts suggest formatting the device before beginning to use them to ensure any unwanted files are removed.
This article particularly talks about the procedure for formatting a hard drive or SSD in Windows 11.
Steps to format a hard drive or SSD in Windows 11:
Let us see the steps to do the formatting.
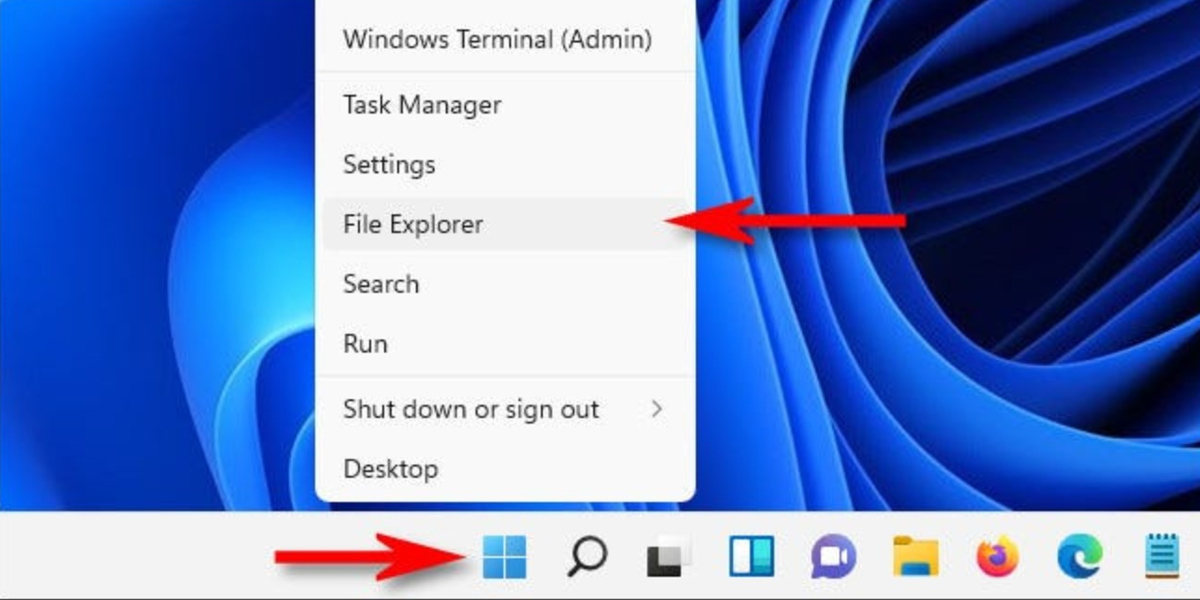
- On the Taskbar of the Windows 11 enabled system, right-click and select “File Explorer”.
- In the File Explorer window, select “This PC” which is on the left side of the screen.
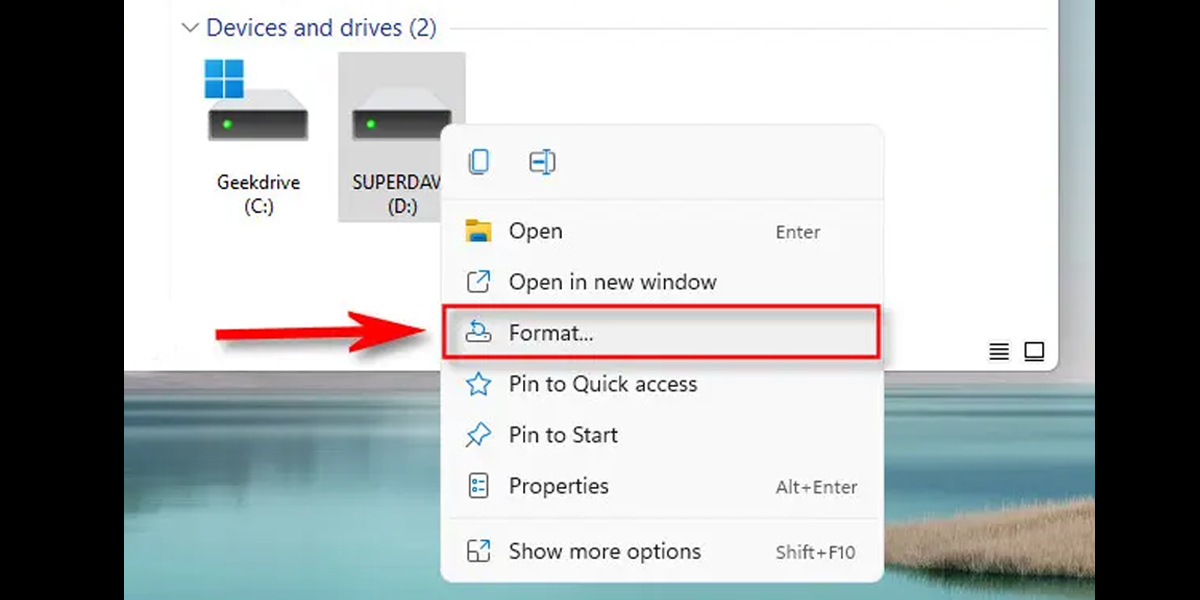
- There, you can see different devices available under “Devices and drives”.
- Right-click on the device you want to format and select the option “Format”.
- Then a Format window will open.
- Format window consists of six options that you can adjust according to your need. The five options are,
- Capacity
- File system
- Allocation unit size
- Volume label
- Format options
- Format window consists of six options that you can adjust according to your need. The five options are,
- Customize those options according to your need.
- Once you decided on the options, click “Select”.
- It will create a popup message that says that “Formatting will erase ALL data on this disk”
- Select “OK” to continue the formatting process.

The system will take some time to format the hard drive or the SSD. After the system formats the device, you will see a popup that says “Format complete”. Close the window and your device is now fully formatted.
Formatting will help you to create more space on the device and encourages quick operation. However, make sure to take a backup of all the data before formatting any device.
I hope you have learned to format a hard drive or SSD in Windows 11 from this article.
Also Read: Here’s how to change the password of your Windows 11

